Answers
Aug 12, 2015 - 06:21 AM
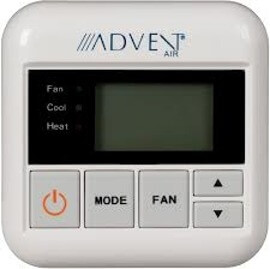
Yes but only if you have an Advent Air ceiling assembly. The Advent Air thermostat will not be compatible with a Duo Therm ceiling assembly.
Aug 27, 2015 - 06:45 PM
I just installed this system this last weekend. Very pleased with it. There are instructions and videos here: http://thebigfootleveler.com/Installa... The video at the top of the page is for Ford Chassis in particular. This manual is about all you really need to do the install. When you get the parts and lay them out, you'll see there isn't much to it. http://thebigfootleveler.com/uploads/... Mount the rams Run the hydraulic lines Wire control panel to battery Run receiver panel wiring to control panel Wire indicator lights Here are some tips I learned along the way. It's an all day job, maybe faster if you can get the RV up on a lift. But it's well laid out and I can save you a few headaches here: - The indicator lights are the only thing that force you to do a little digging/thinking. You have to find a ignition wire to tie into and your own ground. That's about as hard as it gets. (well aside from laying on the concrete welding upside down). - Use the weld on brackets. Bolt on won't work well with the front cylinders. They need spaced out from the frame to tuck up into a recess in the body to get the full 7" of ground clearance they recommend. - The mounting locations are pretty specific, as seen in the video. If you can't weld the brackets yourself, take them to a welder and show him exactly where they need to be. He/she should have no issues getting them square to the ground either. - I thought I was being smart and I put all the bolts in the brackets and tacked the heads in place so that I just would have studs to put the mounts on and then thread on the nuts. Then I'd not have to hold the had of the bolt while torquing down the nuts for the cylinders. There is not enough room for the fronts to be installed if you do this. I had to mount the cylinder to the bracket before welding it on in the front. If I ever need the fronts off I will have to cut the upper bolts and replace. The brackets stand out from the frame plenty far enough to get your hands in there to get a wrench on the bolts. - Mount the rams and run the hydraulic lines BEFORE deciding where to mount your control box. Again I had a place I liked, I drilled the holes in the frame and tacked in some studs. Only to find out that the lines are perfectly measured to have very little slack at the control panel. There are 4 lines of two different lengths. You need the short lines on the side you mount the panel and the long lines on the opposite side. Fortunately I had enough room to mount the panel where the lines wanted to be, it's not my ideal spot, but it works. I mounted it on the side of the battery, the wire they give you is not that long (5-6 feet maybe) so you don't want a huge battery run. However, if that won't work for you, battery cable is available in longer lengths at many auto parts stores. Just get automotive grade battery cable as it's coating will be designed to be resistant to oils and such. So run the lines THEN mount the panel. In fact I ran the lines and hooked it all up with the panel on the ground to test the system before I mounted it. - It's much easier to put ATF in the reservoir sitting on your workbench than to pump it in after it's mounted. It takes just a hair under 4 quarts. - I used zip ties to hold the plastic cover on the control panel. It was easier than drilling a self tapping xxxx into the reservoir and avoids getting metal debris into the ATF. If you do drill and tap, I recommend doing this on your work bench first and have someone hold a shop vac next to the drill bit to keep the debris out. Probably overkill but I'm sensitive to debris in ATF as an automotive engineer. - For the receiver panel (wireless system) they don't give much direction on where to mount the panel. They say to mount it with the plastic side facing forward to avoid road debris. I went a step further and mounted it in a basement compartment to keep it out of the elements. It's pretty well coated but I didn't want to take any chances of damage. The only extras I can think of that you will need are the following: - 4 quarts of ATF (DEX III specified) - Corrugated wire loom for the battery wire and the control wires - butt/ring splices for the indicator lights wiring All in all, I can't think of anything else right now. I do wish they'd detail out the info about the main control box needing mounting in a specific location and give measurements. I'm a planer and like to decide where these things are going before I run the lines. I hope this all helps and I'm happy to answer any other questions.�


Add New Comment